Appearance
Work order process configuration example
Overview
This example combines work order acceptance, order dispatch, door-to-door service, evaluation, and return visits into a verifiable configuration path, making it easier for administrators to select nodes based on the actual enterprise process.
Before you begin
- Use the Service Pass administrator or an account with the permission to configure this topic.
- First confirm that the business objects, roles, channels or plug-in dependencies of the scenario corresponding to the text are enabled.
- Prepare test work orders, test accounts or test channels to verify configuration results.
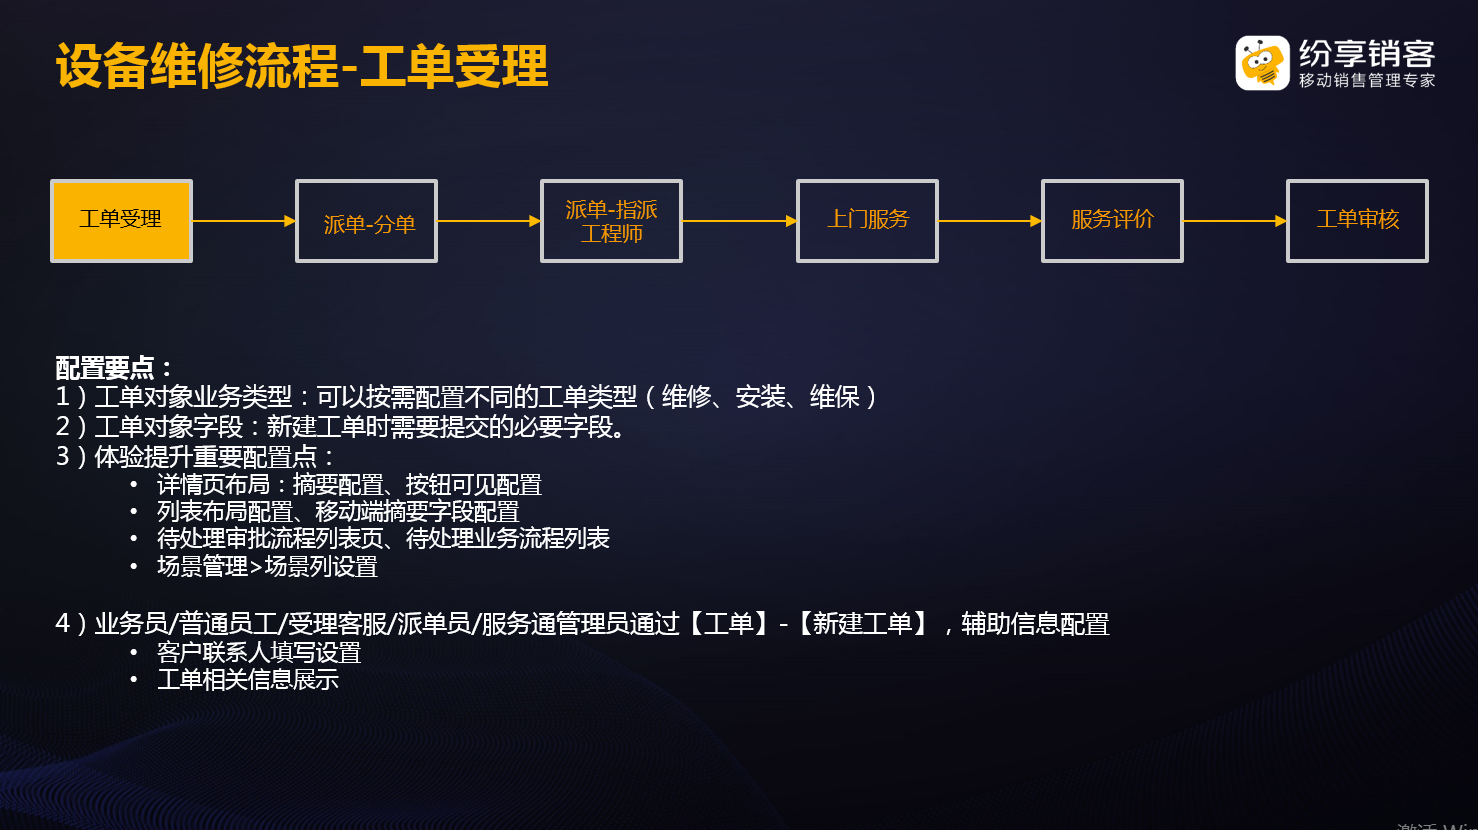
This example helps Service Pass administrators understand and configure a basic service process.
Configuration scenario description:
1. Work order acceptance
- The key points of work order acceptance configuration are to configure the fields and layout of the work order object. For details, please refer to:
2. Work order dispatch-order distribution
- The first order dispatch node can be assigned to the service group: if the service team is divided into divisions, the work order can be automatically/manually assigned to the work order service group.
3. Work order dispatch-assign engineer
- Add a second assignment node, which can be assigned manually by the service team leader, or members of the service group can automatically grab orders, or orders can be automatically dispatched within the service group.
4. Door-to-door service
- Option 1: Standard process business node, edit (work order) object or create new associated object (work order service record).
- Option 2: Configure advanced field type + service field node to complete the overall service process actions for engineers.
- Take configuring standard process business nodes as an example
5. Service evaluation and return visit
- Configure service evaluation rules for your business requirements.
- Add the Service Evaluation application node to the process.
6. Work order process flow diagram
- The flow diagram of work orders according to the above process is as follows:
1. Introduction to process notification
Process external notification: specifically refers to notification to external end users. For example, when an external end user submits a work order or invites an external user to conduct a service evaluation, a notification can be sent to the external user.
Notification types include:
(1) WeChat service account notification, prerequisite: access to WeChat payment account, and the end user has followed the official account and completed registration.
(2) WeChat Mini Program service notification, prerequisite: WeChat Mini Program is used and the end user has completed registration.
(3) SMS notification requires purchase/activation of SMS service
2. Custom process external notification
You can use the post-process action capability to configure notification content for external end users at the service process node.
- Select the node to which external notifications need to be notified and click Finish;
- Click "Add" and select external notification;
- Customize relevant parameters of external notifications
- External notifications are sent to the WeChat service account. Note: If the end user has not registered and bound with the WeChat official account, the notification cannot be received. Only users who have registered with the WeChat official account can receive WeChat messages.
2.1 Maintain WeChat Official Account message templates
Note: If you can't find the required template, sign in to the WeChat Official Accounts Platform and add it from the template library.
Step 1: Add service categories to the template library
Step 2: Select the appropriate template in the template library
3. Configure custom-process SMS notifications
Prerequisite: Activate the SMS service plugin. For configuration and verification, see Configure end-user notifications.
After activating the SMS service, you need to configure SMS signature information, template management, and have a sufficient number of SMS messages before you can send SMS messages normally. For details, you need to go to the SMS service to purchase quotas, apply for SMS signatures, and configure SMS templates.
Action selection after the work order process: SMS notification
The process can send text messages to internal personnel, or specify the mobile phone number of external personnel to receive.
If the mobile phone number is not configured, you need to go to Organizational Structure Management-Departments and Personnel to configure the personnel;
If you do not add a mobile phone number, you will not be able to send text messages;
4. Default WeChat service account external notification
- In the application node of the work order process, the system automatically pushes WeChat public account messages to customers. Note: Customers who have not followed the public account cannot receive the messages.
- As shown in the figure below, the system has preset notification content, including pushing the bill of lading success notification to the end user after the bill of lading is successful, pushing the service evaluation invitation message at the service node, etc.
- Click Disable in the action column and the message will not be pushed.
- Work order submission: The end user submits the work order in the WeChat service account and then pushes it to the submitter.
- Work order completion: After the work order process is completed, it will be pushed to the submitter on the WeChat service account
- Work order termination: After the work order process is terminated, it will be pushed to the submitter on the WeChat service account
- Invite evaluation: The work order process flows to the service evaluation application node and is pushed to the submitter on the WeChat service account
- Evaluation completed: After the service evaluation is submitted, notify the submitter through the WeChat Official Account.
- Service report: After the service report is generated, it will be pushed to the service report recipient on the WeChat service account.
- Service report signature: After the service report is generated, it will be pushed to the invitation signature recipient on the WeChat service account.
Edit notification content and customize message content:
- Click Select Template to select WeChat’s template message
- Customizable summary fields
- Customizable keyword push fields
5. Default WeChat mini program service notification
- In the work order process, mini program messages are automatically pushed to customers. Note: Customers who have not submitted work orders from the mini program cannot receive the messages.
- As shown in the figure below, the system has preset notification content, including pushing the bill of lading success notification to the end user after the bill of lading is successful, pushing the service evaluation invitation message at the service node, etc.
- Click Disable in the action column and the message will not be pushed.
Edit applet notification
- Mini program template messages cannot be changed
- Customizable keyword push field content
6. Default SMS notification
- Send SMS notifications to customers during the work order process. Messages aren't sent when the SMS quota is exhausted. See Configure end-user notifications.
- As shown in the figure below, the system has preset notification content, including pushing the bill of lading success notification to the end user after the bill of lading is successful, pushing the service evaluation invitation message at the service node, etc.
- Select Disable in the action column to stop the message.
7. Notification examples
After the end user places a bill with the WeChat service account, the WeChat service account notification received is as follows:
After the end user submits a work order in the mini program, the schematic diagram of the mini program notification received is as follows:
Expected results and verification
- After saving the configuration, use the role, channel or test ticket corresponding to the scenario in this article to verify the entry and results.
- If configured as a process, notification or automated task, both the trigger condition and the next responsible role should be verified.
Notes
- The actual visible menus, fields, buttons and channels depend on the configured role permissions, business type and pre-plugins.
- For grayscale, optional or ability to rely on external channels, first confirm that the dependency is enabled, and then verify it on the test record.